
Creating a product in Sitioo is done from one editor. You define what the item is, how it is priced, whether stock is tracked, which images represent it and, when needed, which variants can actually be purchased. This guide walks through every main section shown in the product editor.
Before you start
You can create a product with only the essential information and refine it later. For a smoother setup, have the product name, price, images, optional SKU, approximate stock and any variant information such as color or size ready.
1. Open the Products section
From the store dashboard, select Products in the left navigation. This opens the catalog area for the current store.
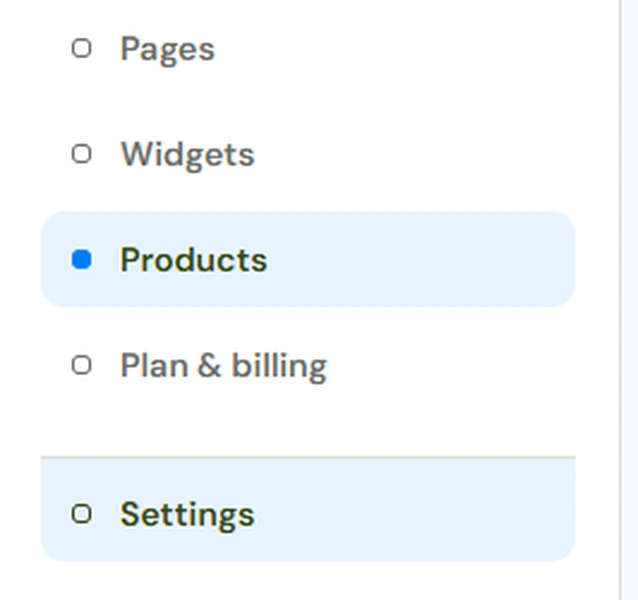
The catalog page shows the number of products, a search field, a status filter and the + Create product button. Search can be used by product name, SKU or hashtag, which becomes especially useful once the catalog grows.

2. Complete the product details
The Product details section contains the information that identifies and describes the item. Fill it in with customer-friendly wording and keep internal identifiers, such as the SKU, for the pricing and inventory section.
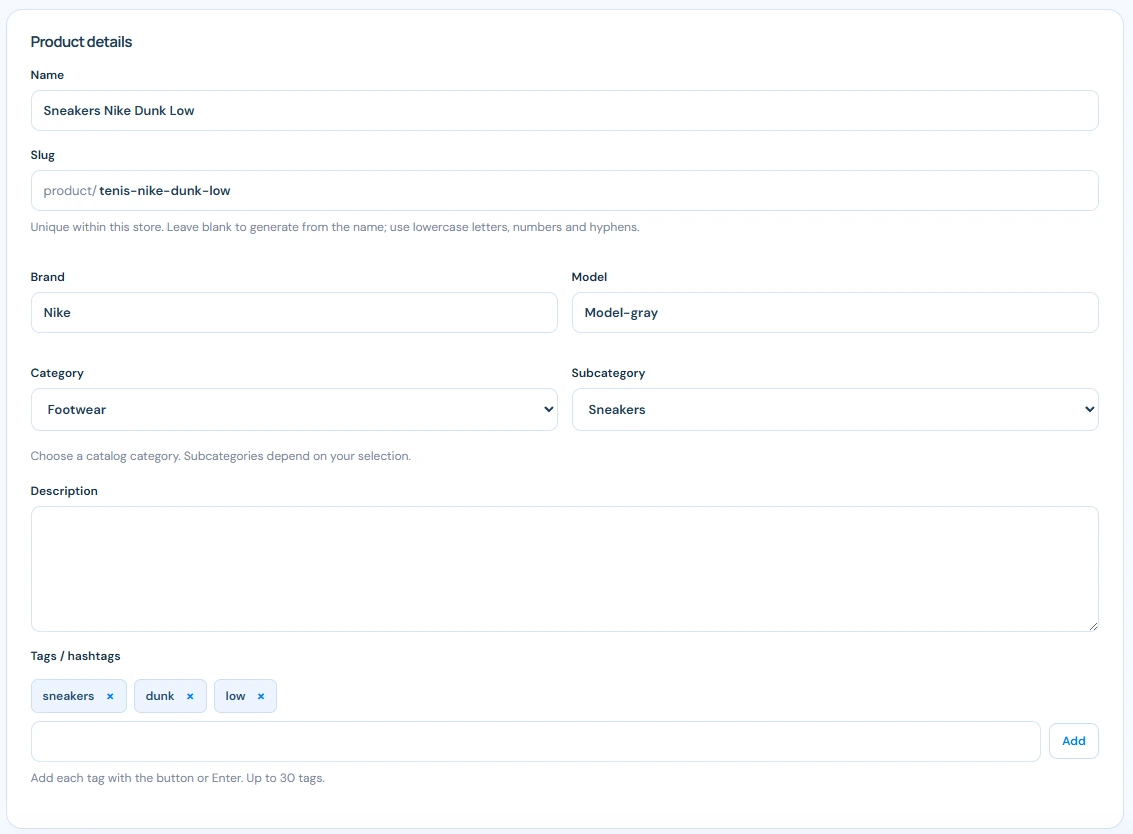
Name and slug
Name is the customer-facing product name. Slug is the URL-friendly identifier that appears after product/. It must be unique within the store. You can leave it blank to generate it from the name, or enter one using lowercase letters, numbers and hyphens.
Brand, model, category and subcategory
Brand and Model help identify the exact item. Category places the product in the store catalog taxonomy, and Subcategory becomes available according to the selected category. Choose the most specific classification that accurately describes the product.
Description and tags
Use Description for the information a buyer needs to understand the product: what it is, key characteristics, materials, fit, use or other relevant details. Tags / hashtags help organize and find the product. Add a tag with the Add button or by pressing Enter. The editor allows up to 30 tags.
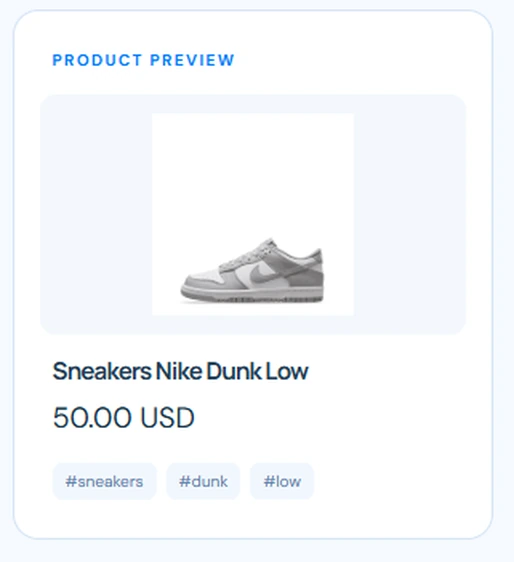
Use the product preview as a quick check
3. Configure status, currency, pricing and inventory
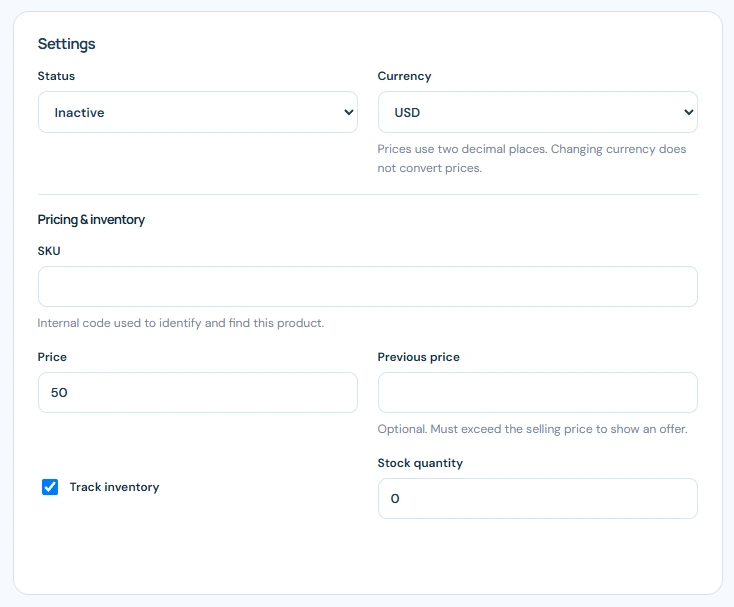
- Status: choose whether the product is Active or Inactive. Keeping a product inactive while you finish its information is useful when it is not ready yet.
- Currency: select the currency used for the product price. Changing the currency does not convert existing price values automatically.
- SKU: an internal code used to identify and find the product. Use a consistent SKU convention if you manage many items.
- Price: the current selling price of the product.
- Previous price: optional. It must be higher than the selling price for Sitioo to display it as an offer reference.
- Track inventory: enable it when you want Sitioo to keep a stock count for the product.
- Stock quantity: enter the quantity currently available when inventory tracking is enabled.
4. Add product images and video
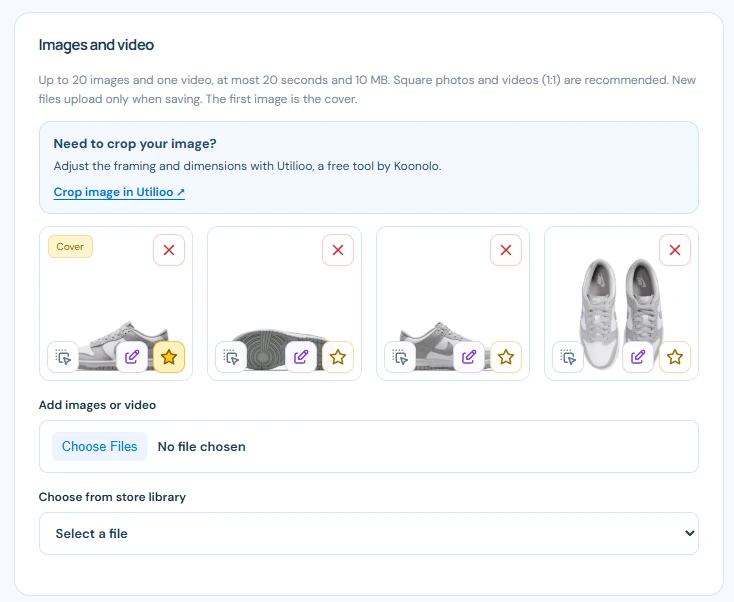
You can add up to 20 images and one video. The video can be up to 20 seconds and 10 MB. Square 1:1 media is recommended because it adapts well to product cards and galleries. New files are uploaded when you save the product, and the first image is used as the cover by default.
- Cover: the Cover badge and filled star identify the current cover image. Use the star on another image when you want that image to become the main product image.
- Remove: the red X removes that media item from the product.
- Choose Files: upload new images or video from your device.
- Choose from store library: reuse a file that already belongs to the store instead of uploading it again.
- Need to crop your image?: the editor links to Utilio, a free tool by Koonolo, when you want to adjust framing or dimensions before using an image.
5. Add options and variants when the product has choices
If the product is sold in only one configuration, you can leave This product has variants disabled and manage price and stock at the product level. Enable it when customers must choose between combinations such as color, size, material or capacity.
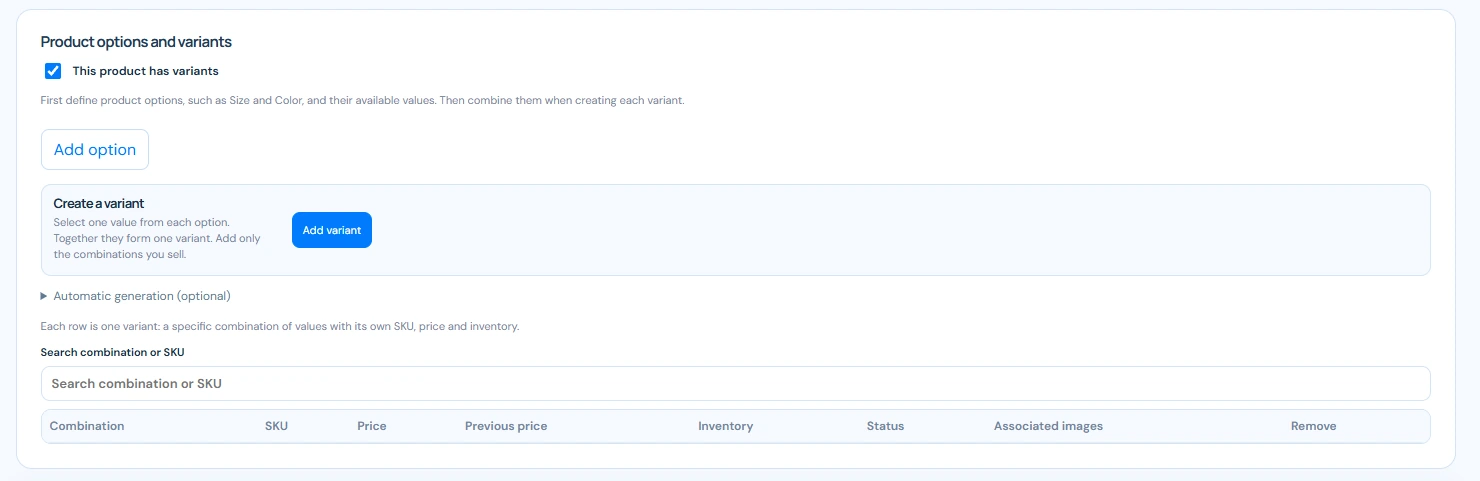
Add an option
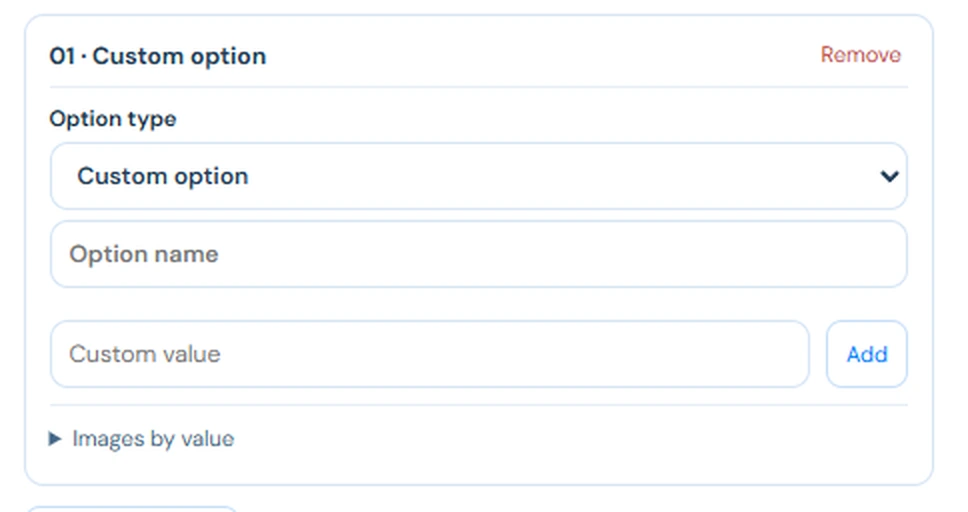
Click Add option to create the first option. With Custom option selected, enter an Option name and then add each Custom value. Remove deletes the entire option, while the small x on a value removes only that value.
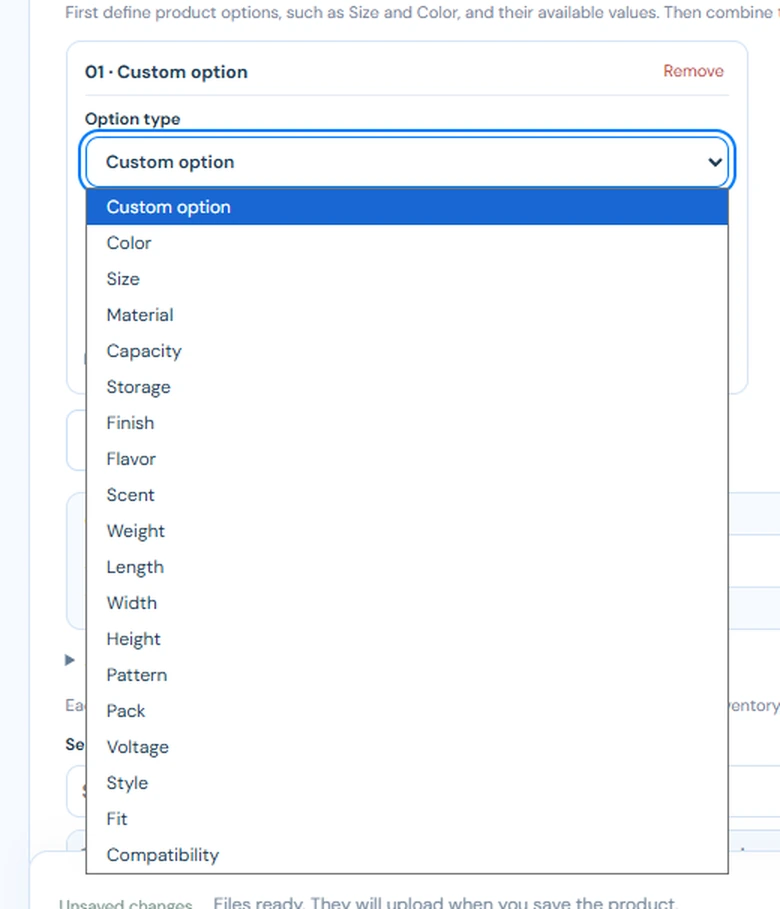
The option type menu includes Custom option, Color, Size, Material, Capacity, Storage, Finish, Flavor, Scent, Weight, Length, Width, Height, Pattern, Pack, Voltage, Style, Fit and Compatibility. Predefined types make common product choices faster to configure.
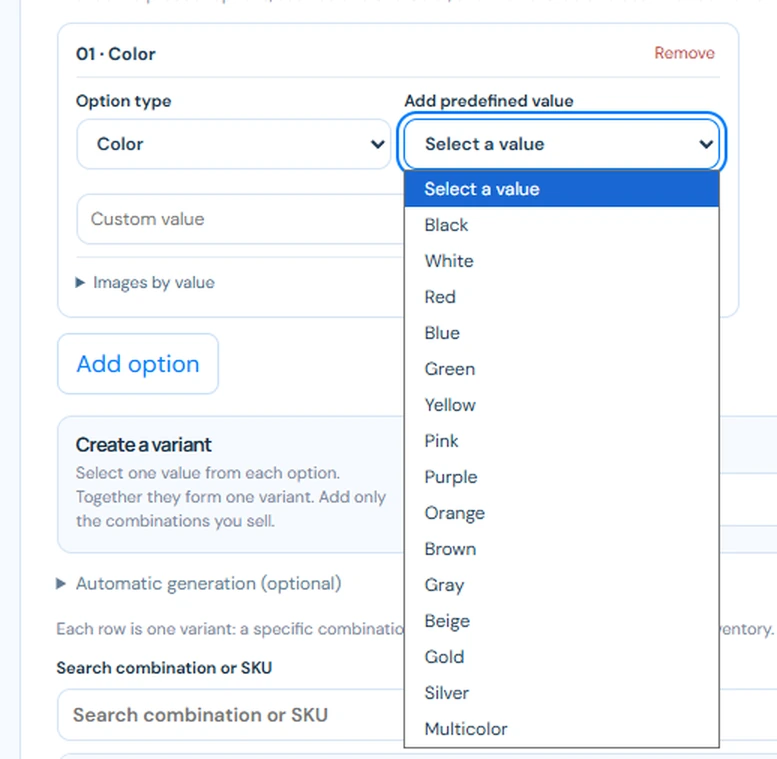
For Color, for example, the Add predefined value menu offers common values such as Black, White, Red, Blue, Green, Yellow, Pink, Purple, Orange, Brown, Gray, Beige, Gold, Silver and Multicolor. You can also type a Custom value when the exact value you need is not listed.
Images by value is useful when a value should have its own visual reference, such as showing the black photos when Black is selected. This keeps the product media aligned with the option the customer chooses.
Combine more than one option
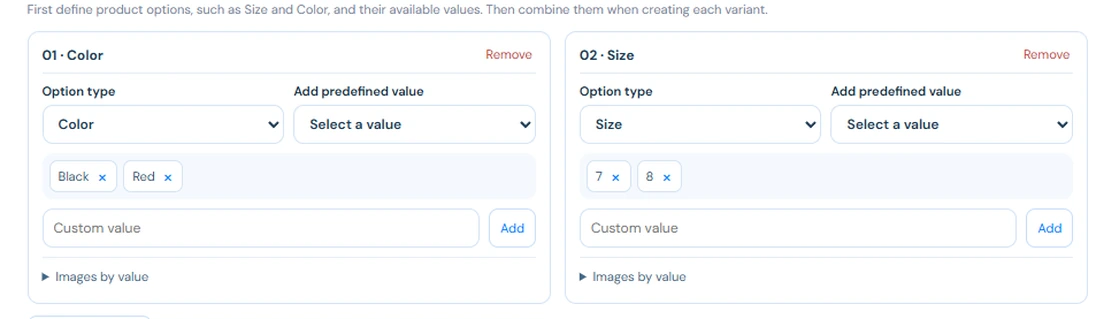
Add another option when the product varies in more than one way. In the example, Color has Black and Red, while Size has 7 and 8. These values become the building blocks for the sellable variants.
Create the combinations you actually sell

In Create a variant, select one value from each option. Together those values form one variant, such as Black / 7. Add only combinations you really sell. If there are many combinations, the Automatic generation section is available as an optional faster path; review the generated combinations before relying on them.
Configure each variant

- Combination: shows the option values that identify the variant.
- SKU: use a unique internal code for that specific combination when needed.
- Price: set the selling price for that variant.
- Previous price: optionally set a higher reference price for an offer.
- Inventory: use the checkbox and quantity field to track stock for that combination.
- Status: keep the individual variant Active or Inactive.
- Associated images: connect the relevant product images to that specific combination.
- Remove: deletes that variant row.
- Search combination or SKU: use the search field above the table when the variant list becomes large.
6. Save the product
Click Save product when the setup is ready. Newly selected media files are uploaded as part of this save. Back to products returns to the catalog, so save first when you want to keep the changes you just made.
7. Review the product in the catalog
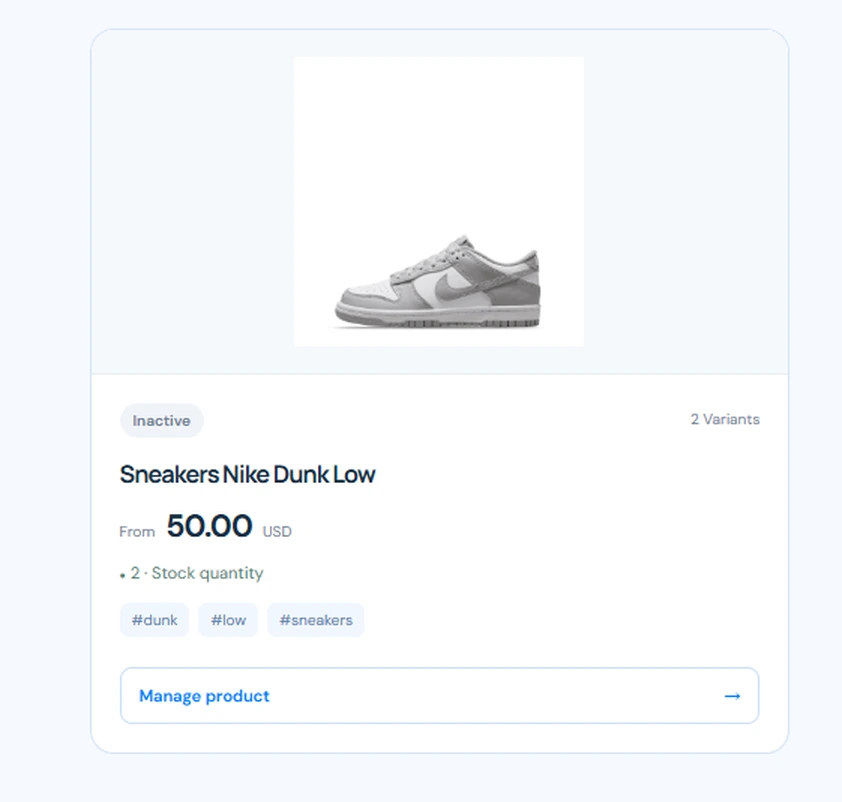
After saving, the catalog card gives you a compact summary: status, number of variants, cover image, product name, price or starting price, inventory information and tags. Use Manage product whenever you need to edit the item again.
Final checklist for your first product
- Use a clear customer-facing product name.
- Review the slug and keep it short and readable.
- Choose the correct category and subcategory.
- Write a useful description instead of only repeating the product name.
- Confirm currency, current price and optional previous price.
- Decide whether inventory should be tracked and enter the correct stock.
- Upload clear media and choose the correct cover image.
- If the product has variants, create only real sellable combinations and review every row.
- Check whether the product and each variant should be Active or Inactive.
- Save the product and review the final catalog card.
For a first product, keep the setup simple. Start with accurate information and only the variants you actually sell; you can return to Manage product later to refine the catalog as your store grows.